In this tutorial I will show you how to send a payment request with Payoneer so that a client can pay you using their debit/credit card, and if they’re from the US they can also pay with Paypal. At the bottom of the article there is a video where I show you how to do it live.
What is a payment request?
Sending a payment request to a client allows them to pay you through Payoneer using their credit or debit card. If they’re in the USA they can also pay you using their Paypal account. After they make the payment, the money will arrive in your Payoneer account within 2-3 days. The fee, which is 3.99% + $0.49 per payment, can be paid by the client/sender if they choose to, otherwise it will be paid by you – the person who receives the payment.
I’ve used this option many times over the years, and in almost all cases it worked perfectly. In a few rare cases a client couldn’t pay using their card. I’m not entirely sure why that is. Maybe it’s because of the type of card that they had, or maybe it was because of their country, but it has happened.
In those cases, a nice alternative where you can also receive payments with a debit/credit card and with Paypal is a payment processor called 2Checkout. You do need to have your own website in order to use this one, but check it out if you want. It’s a legit payment processor.
How to send a payment request?
To send a payment request to a client with Payoneer, you will need some of their information.
- First Name
- Last Name
- Country
- State (if you’re from the USA)
- Company Name
- Website URL
- Contact First Name
- Contact Last Name
- Country
- State (if you’re from the USA)
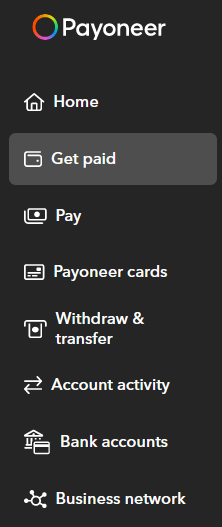
After you have this info, you login to your Payoneer account and you click on “Get Paid” on the left side.
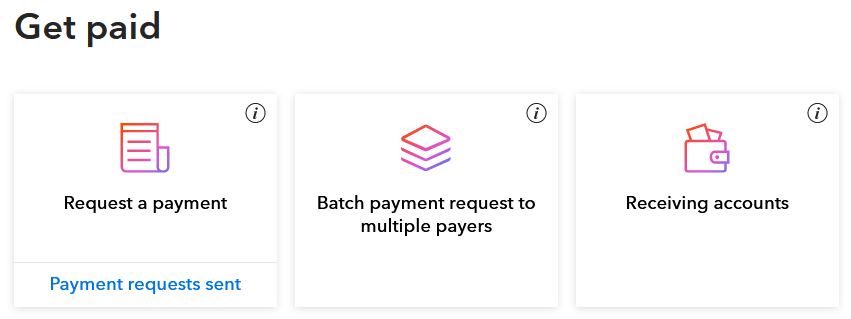
Now click on “Request a payment”
Now click on “Add new payer”

The parts I have hidden are clients to whom I had sent payment requests in the past. Payoneer remembers them for you, so that if you need to send a payment request to the same person again, you can just click on their name and they’ll autofill all the important info.
Now select either “Company” or “Individual“, depending on who is paying you.
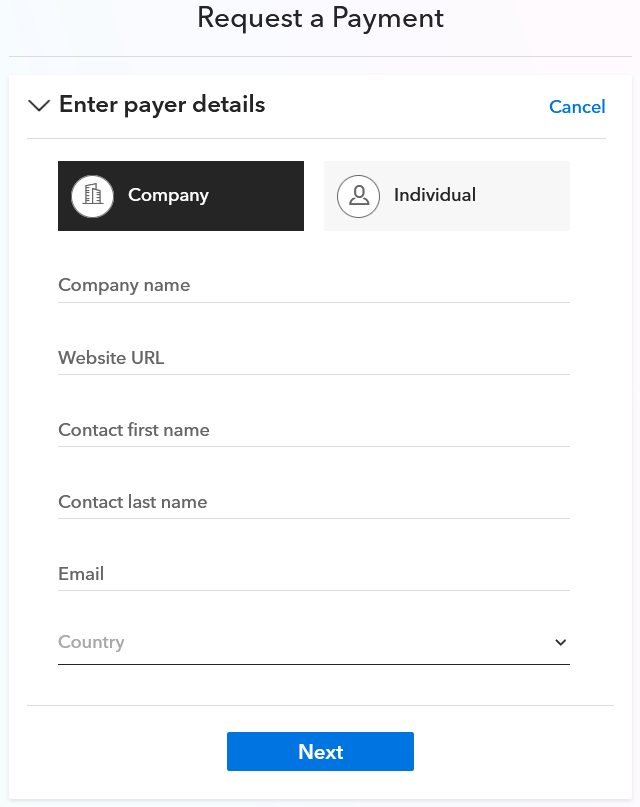
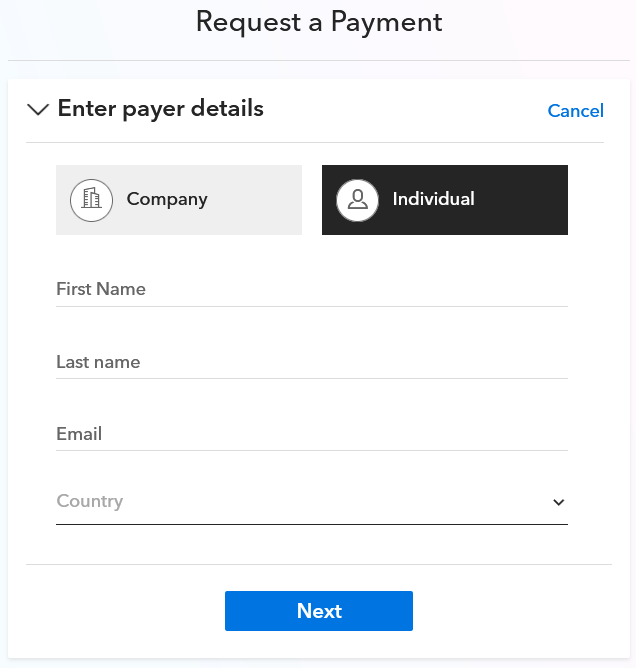
Now take the info your client gave you, and fill it in correctly. Then click on “Next“.
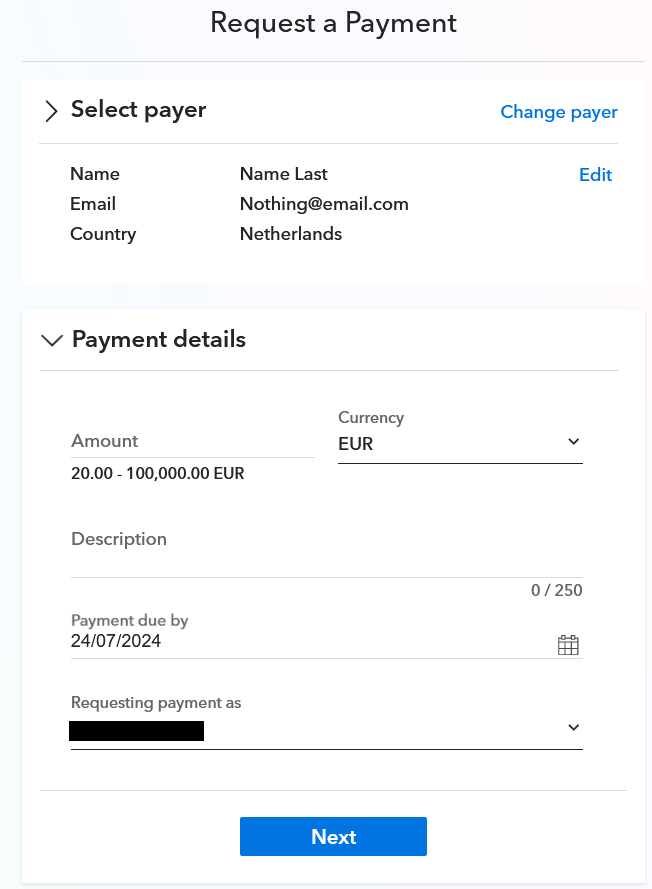
On top you will see your client information. Under “Payment details” insert the Amount, the Currency, the Description, the Payment due by, and the Requesting payment as.
Now click “Next”
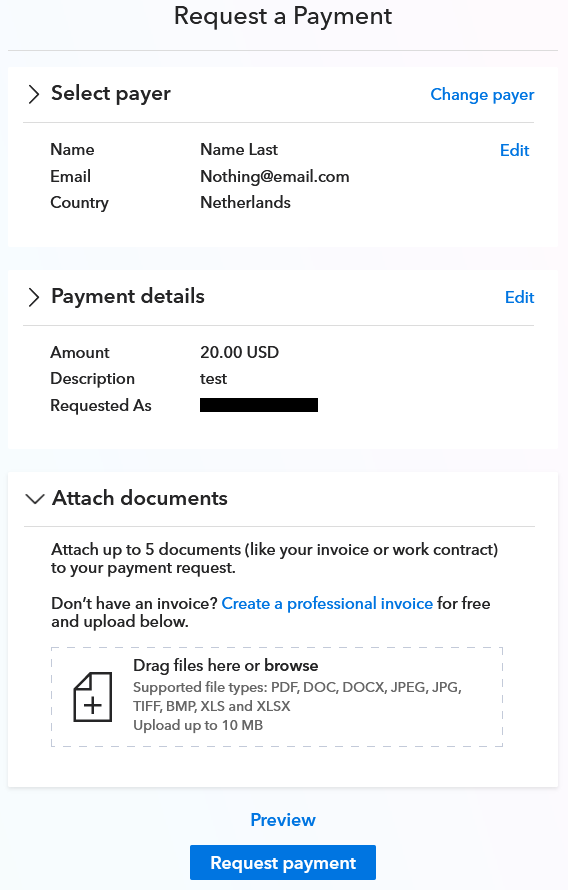
On this page you can review the information, and you can attach documents. I’ve never used the attach documents option, so you can just leave that as it is.
Now click on “Request payment“, and you’re done.
What happens now?
Now the client will receive an email on the address they’ve given you, and from there they can proceed to make the payment. I’m not entirely sure if they need a Payoneer account in order to pay or if they can pay without having one. But there is a chance they will have to create an account in order to make the payment.
If they choose to pay with a debit/credit card, they will be taken to a page to enter their 16-digit number, expiry date and pin code. And if they choose to pay with Paypal (only if they’re in the US), then they’ll have to login to their Paypal account and make the payment.
After they’ve made the payment, you will receive an email from Payoneer notifying you about it. In the email they will tell you when the money will clear in your account (usually within 2-3 days). Remember, there is always the possibility that the money eventually doesn’t get deposited to your account – like if the client doesn’t have enough money in their Paypal or bank account to pay you. But you will only know this on the date when the money is supposed to clear.
So if this is a client who you’ve never done business with in the past, or if there is any cause for concern, it’s best to wait until the money lands in your account before doing or delivering any work. Better safe than sorry.
This is what the final email looks like that notifies you that You have Received a Payment!

This is the final email, the one you receive a few days after the client makes the payment.
Now the money has been deposited in your Payoneer account.
Here is a video I made talking about this:
Conclusion
Getting paid on Payoneer is very convenient, whether it’s done by a Payoneer-to-Payoneer payment, or a bank transfer, or by sending a payment request. And with the recent addition of your US clients being able to pay with their Paypal account, it only got better. I’ve been using the payment request feature for many years. The fees are low, the process is simple, and it works very well, almost every time.
Another option that’s worth mentioning where people can pay you using a debit/credit card and Paypal, is 2Checkout. I just feel like it’s worth mentioning, because I’ve also been using them for many years, and I never had any problems. But you do need to apply in order to get a 2Checkout account, and you do need to have your own website for that.