Pinterest Blocked My Website – Workaround Tutorial
Yesterday Pinterest blocked my website called Socialesale.com. That means that every time someone tries to open a link from Pinterest that leads to that website, they get taken to an error page, and don’t land on my site. Obviously, this is a problem for me.
So I sat down and implemented a workaround that will allow me to take people from Pinterest to my website, do it for free, and do it in a way that Pinterest can’t block very easily (using Blogger redirects).
The theory was this. Create a simple free Blogger blog, create a blogger post for every post I have on my website, and then redirect each post from the blogger to my website. So whenever someone lands on my blogger post they will automatically get redirected to my website page. Then I would go to my Pinterest account and edit each pin and change the website it leads to, and that will be that.
So I got to work, and I did it. It worked fine. You can check the final result by trying to open any of the pins and click through to my site, here -> Socialesale’s Pinterest Account.
Note: This same workaround can be implemented to get around blocked links on Twitter, Facebook and any other social network. And this has been working for years by the way, so the method should continue to work for a long, long time.
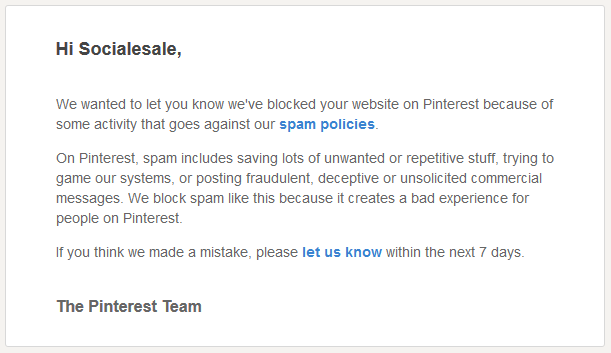
Beginning – “We Blocked Your Website On Pinterest”
Here is how it all started:
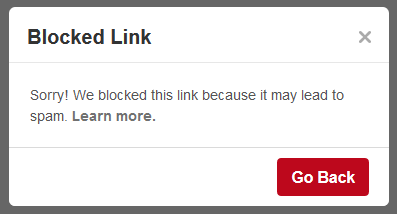
So if you try to visit any link from Pinterest that leads to Socialesale.com, you get the following error:
You can actually test it by going to the Pinterest account – https://www.pinterest.com/socialesale/ – and clicking on the Socialesale.com link as shown below:
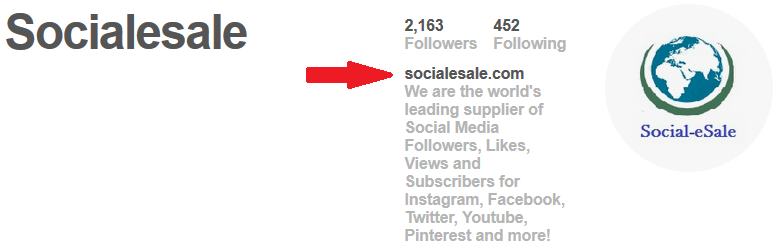
I haven’t changed that URL there for 4 reasons:
1) Because my website is verified on Pinterest, and that link there is a dofollow link (very good) which i believe will still pass link juice back to my site (even though the site can’t be accessed from Pinterest, but the search engines don’t know that, I think).
2) Also, I’ll be able in the future to easily check if Pinterest ever unblocks my website by simply clicking that link.
3) Also, if someone lands on my Pinterest and tries to click that link and can’t get through, maybe they’ll type it out in their address bad or search engine, and go to my site site anyway. I mean, how hard is it to type “Socialesale.”
4) And lastly, it just looks better to have that there rather than the blogspot homepage, which is a long URL: http://buysocialmediaservicessocialesale.blogspot.com/
Note: Let me just say, my website was blocked on Pinterest because it’s a website where I sell social media services. The type of services that are not allowed by the various social networks (Followers, Likes, Views, etc). It had nothing to do with spamming or gaming their system or being fradulent.
My entire Pinterest promotion method for this site – which has about 15 pages total – was to simply post each page on my Pinterest account one time, and then send Likes and Repins to those 15 pins, and followers to the profile. There was absolutely no spamming or anything like that going on.
That Pinterest account is almost 2 years old, so it took them a while to catch up haha…
Creating the Blogger Blog I used to redirect
I’m not going to go into a huge detailed description on how to create the blogspot. Most of you reading this probably already have a few blogspot blogs. And if you don’t know how to create one, go look it up on Google. All you need is a Gmail account, and then visit https://www.blogger.com and create your blog.
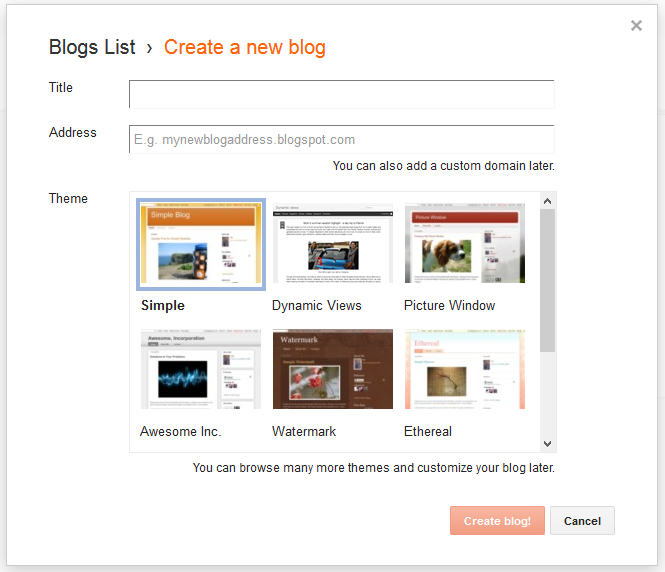
1) Input the Title – make sure it’s relevant to the website you will be redirecting to
2) Input the Address – make sure it’s relevant to the website you will be redirecting to
3) You will want to create the blog using the Simple template (which is selected by default).
Stopping the country redirection
What blogger does by default is it redirects your url to local domains, or country-specific URL (Country code TLD). I won’t be explaining this here. If you want more info about this, go and Google it.
- Here is a tutorial about this that looks okay at first glance: http://helplogger.blogspot.com/2015/10/stop-blogger-redirecting-blogspot-country.html
It doesn’t really matter why this happens though. Just trust me on this. Just do the following to stop it:
Go to your blog and click on Theme, and then click on Edit HTML. In there find <head>
Below that, input the following code:
<script type=’text/javascript’>
var blog = document.location.hostname;
var slug = document.location.pathname;
var ctld = blog.substr(blog.lastIndexOf("."));
if (ctld != ".com") {
var ncr = "http://" + blog.substr(0, blog.indexOf("."));
ncr += ".blogspot.com/ncr" + slug;
window.location.replace(ncr);
}
</script>
Now click on Save Theme, and that’s it.
Preparing the Blogger – stripping it
Now you will want to strip the blog from all unnecessary widgets and things. You’ll understand why later…
1) Go to Layout, and click Edit next to the About Me gadget in the right sidebar, and then click Remove. Do the same for the Blog Archive gadget which is also there.
2) Now again on the Layout page, click Edit next to the Navbar gadget, then tick Off, and then Save.
3) Remove the Attribution gadget. To do this, go to Theme, and click on Edit HTML. In the code there click anywhere, and then press CTRL+F on your keyboard. In the search bar that will appear, search for this:
<b:widget id=’Attribution1′ locked=’true‘ title=” type=’Attribution’>
Change the part in Red and make it ‘false‘. Then click the Save Theme button.
Now go back to Layout, and at the bottom click Edit next to the Attribution gadget, and then click Remove.
4) Remove the “subscribe to: Posts (Atom)” link and content-inner.
To do that, go to your Blog’s Dashboard –> Theme –> Customize –> Advanced –> Add CSS. In the Add Custom CSS window add the following lines of code:
.feed-links { display:none !important;}
.content-inner { display:none !important;}
Click on Apply to Blog in the upper-right corner of the screen, and it’s done!
Enable and Input Meta Descriptions
You can skip this step if you want, but I enabled Meta Descriptions and inputted a description for my blog’s homepage, as well as for every post I created and redirected.
To do it, go to your blog and click on Settings. Now you are on the Basic section. Find where it says Description, and click Edit next to it and write a description for this blog.
Next click on Search Preferences under Settings, and then find Description again, click Edit next to it, and write a description there too.
That’s done (we did this in order to write a description for our blog, but also this is necessary in order to be allowed to enter descriptions for each individual post).
Creating new posts (which we will redirect later)
Go to your blog, and click on New Post. Now you will land on the page where you will be able to create your post.
The only thing you really need here is to insert the Title and click Publish. Personally, I also inserted a Label, The Meta Description, and changed the Permalink a little for each post.
Create as many posts as you need for your redirection needs (each post can be redirected to 1 other external URL).
Redirecting posts to external URLs
Now we will input the code which will redirect each post to the link of your choice.
Go to your blog and click Theme, and then click on Edit HTML. In there, find this: <head>
Below that, insert the following code:
<b:if cond=’data:blog.url == "Your-Blogger-Post-Link-HERE"’>
<meta http-equiv=’refresh’ content=’0;url=External-Post-Link-HERE‘ />
</b:if>
Change the parts in Blue accordingly. Then click Save Theme.
Now your Blogger post will redirect to the External Post. Boom, Done!
Note: You must do this for each post you want redirected. Simply insert the same code again and again as many times as you need.
Change post pages to a picture/landing page
The problem I encountered while doing this was that the redirection is not instantaneous. So the blogger crappy page would be visible for a few seconds before the redirection happens, and it looked very bad. I didn’t want to spend time beautifying the blogger posts, so I decided to make each post be 1 picture, which is the same as the external URL the post redirects to.
- For example, visit this: http://buysocialmediaservicessocialesale.blogspot.com/2017/03/youtube-video-likes-high-retention-views-channel-subscribers.html
You will notice that the few seconds it takes for the blog to redirect, the page looks basically the same as the external page the post leads to.
To accomplish this, we need to do two things…
1) Go to the page/external post you will redirect a particular blogger post to, and take a picture of the page (I used the snipping tool in windows to take the photo). Now go and create a new post on your Blogger, and upload your photo in the post. Click on the photo, and select “Original Size.” Now click Save on the post, and then close it (don’t publish this post, just let it sit as a Draft).
2) Now go to Themes, and click Edit HTML, and in there find this: </b:skin>
Below that, paste the following code:
<b:if cond=’data:blog.url == "YOUR-BLOG-PAGE-URL"’>
<style type=’text/css’>
/*— Find out all the ids or classes of the main wrappers and add them in below code to hide them—*/
.sidebar-wrapper, .header-wrapper, .post-title, #blog-pager, .post-footer, #footer-wrapper, .comments {
display: none !important; /*– This will hide those main wrappers–*/
}
/*—If you’re using one of the default blogger templates—*/
.header-outer, .column-right-outer, .tabs-outer, .footer-outer {
display: none !important; /*– This will hide header, footer, navbar and sidebar–*/
}
/*—Changing the Content Width to 100%—*/
#content {
width: 100% !important; /*—This will change the content area width to 100%–*/
}
/*—Changing The Body Background Image And Color—*/
body {
background: #FFF url(‘YOUR-IMAGE-URL‘) no-repeat scroll top center !important;
margin:0;
padding:0;
}
</style>
</b:if>
Now you will need to change the parts in Blue. The first part is your post’s URL, and the second part is the link to the photo you uploaded in step 1. Click on Save Theme, and that’s it.
Note: You must put the same code for each post you want to turn into a photo/lading page.
Redirecting Pinterest Pins to new URLs
Since I did this for my Pinterest account – to get around their block of my website’s URL – now I went to my Pinterest and edited each Pin I had uploaded, and changed the Website section of each pin. I added my blogger links, and the result is right here: https://www.pinterest.com/socialesale/our-social-media-services/
Enlarge any pin and click on it to go to the URL it leads to. You will see the link goes to the blogger I created, and then it redirects to my website – Socialesale.com.
Summary
Using this method you can redirect any and as many blogger posts to external links as you want. You can do the same for your Blogger homepage by the way, using the same method above.
I know this post is a little long. I tried to make it as fluff free and as descriptive as possible. If you encounter any problems or have any questions, just leave me a comment below and I’ll help you as best as I can.
Does this method still work?
Hey Rizwan,
I haven’t tried it in a while, but it should absolutely still work, yes :)
works on facebook?
It might, but I can’t say for sure. Facebook is pretty good with detecting stuff. The only way to really find out is to try it and see.
I have tried other similar methods such as a simple redirect on a blogspot page. Double redirection and it works but then delete it. It’s strange because it marks some errors in the code when I add it to the html.
Thanks for answering fast hehe
Could you check if it works on facebook? I really followed the steps but some codes marked them in red
Sorry man I don’t have time to check if it works on Facebook. You’ll have to check for yourself.
Error al analizar XML, línea 6, columna 8: Attribute name “if” associated with an element type “b:” must be followed by the ‘ = ‘ character
how i fix thos?
I’m not sure. Blogger has made some changes since I wrote this post. That said, the redirection I created back in 2017 still works, as you can see if you click the link in the post above. So it definitely still works, but I’m not sure how to solve the error you have.